If you’re thinking about building a do-it-yourself deck, but you don’t know where to start, this one’s for you. While building a DIY deck is absolutely possible with some time, effort, and the right tools, it’s important to keep in mind that it is not a small project. Before you start, remember to do some research so you understand what you’re getting yourself into. In this article, we will give you an overview of the steps involved in building a deck, as well as some helpful tips to keep in mind along the way.
Step 1: Planning Your Deck
The first step in any DIY project is planning. You’ll need to do a lot of research on decks to help you decide on your deck’s style, aesthetic, and material, as well as any resources and tools that you will require later on. You will then need to take measurements to determine the size and location of your deck. It is also crucial that you look into obtaining any necessary permits from your city or town before starting construction. Once you have all of that sorted out, you can move on to the next step.
Step 2: Preparing the Ground
After you’ve planned everything out, it’s time to start preparing the ground for your deck. This step is critical—if done incorrectly, it could lead to big problems down the road. First, you’ll need to mark out the perimeter of where your deck will go using string or spray paint. Then, using a shovel or power auger, dig holes around the perimeter for the footings of your deck. The depth of these holes will depend on the frost line in your area—in general, they should be at least 12 inches deep. Once the holes are dug, mix concrete and pour it into each hole until it’s level with the ground surface. Allow the concrete to cure for at least 24 hours before moving on to the next step.
Step 3: Installing the Joists
Now that the footings are cured, it’s time to install the joists—the horizontal beams that will support your decking boards. To do this, first, measure and cut lumber to length for each joist (you’ll need two per hole). Then use galvanized hanger nails or joist hangers to attach each joist to its corresponding footing. Be sure that all of your joists are level before moving on!
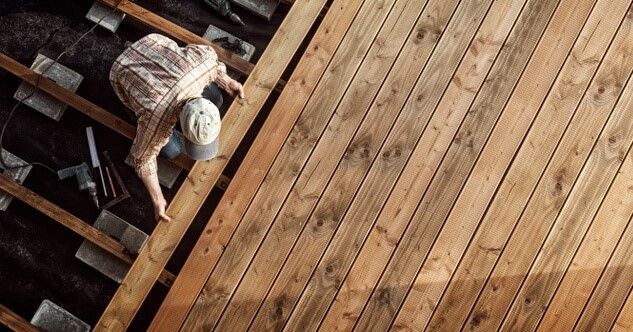
Step 4: Laying Down Decking Boards
Now comes the fun part: laying down the decking boards! Simply start at one end of your deck and work your way towards the other end, attaching each board with galvanized nails or screws as you go (be sure not to use regular nails or screws here—galvanized nails or screws are made specifically for outdoor projects to prevent rust). Once all of your boards are in place, sit back and enjoy your new deck!
Step 5: Finishing Touches
There are a few final touches you may want to add to enhance the look of your deck. You may need to include stairs, railings, or other decorative features, such as planters or benches. Other desired decorative pieces, including outdoor furniture or lighting, can also be added! These can really help bring your new space together and make it feel like home.
Building a DIY deck is not as daunting as it may seem – it can be a very fun and rewarding project. Just remember to take things slowly, do thorough research, and consult with an expert first, if possible. If you would like to get in touch with our deck contracting experts, give us a call – we’d be happy to help.